Integrating AWS Services with the Image Processing Application
Integrating AWS Services with the Image Processing Application
In this section, we will run an enhanced version of our Image Processing Application that integrates remote AWS services, specifically Amazon S3 for storage and DynamoDB for database management. By leveraging AWS resources, we'll demonstrate how cloud services can effectively replace local storage and databases, providing scalability, durability, and easy maintenance.
Prerequisites
In addition to the prerequisites covered in Running the Image Processing Application Locally (e.g., Git, Python, Pip, Docker, etc.), we also need to install and configure the AWS Command Line Interface (CLI) to enable interaction with AWS services.
Step 1: Install the AWS CLI
The AWS Command Line Interface (CLI) allows you to interact with AWS services from your local machine using commands in the terminal. Depending on your operating system (OS), follow the instructions in this AWS CLI installation guide to install the AWS CLI. Once the AWS CLI is installed, you can confirm the installation by running the following command in the terminal:
aws --version
Step 2: Configure the AWS CLI
After installation, you need to configure the AWS CLI with your credentials so that it can interact with your AWS account. To accomplish that, you need to confure the following steps:
- Open a terminal or Command Prompt and run the following command:
aws configure - You will be prompted to enter the following information:
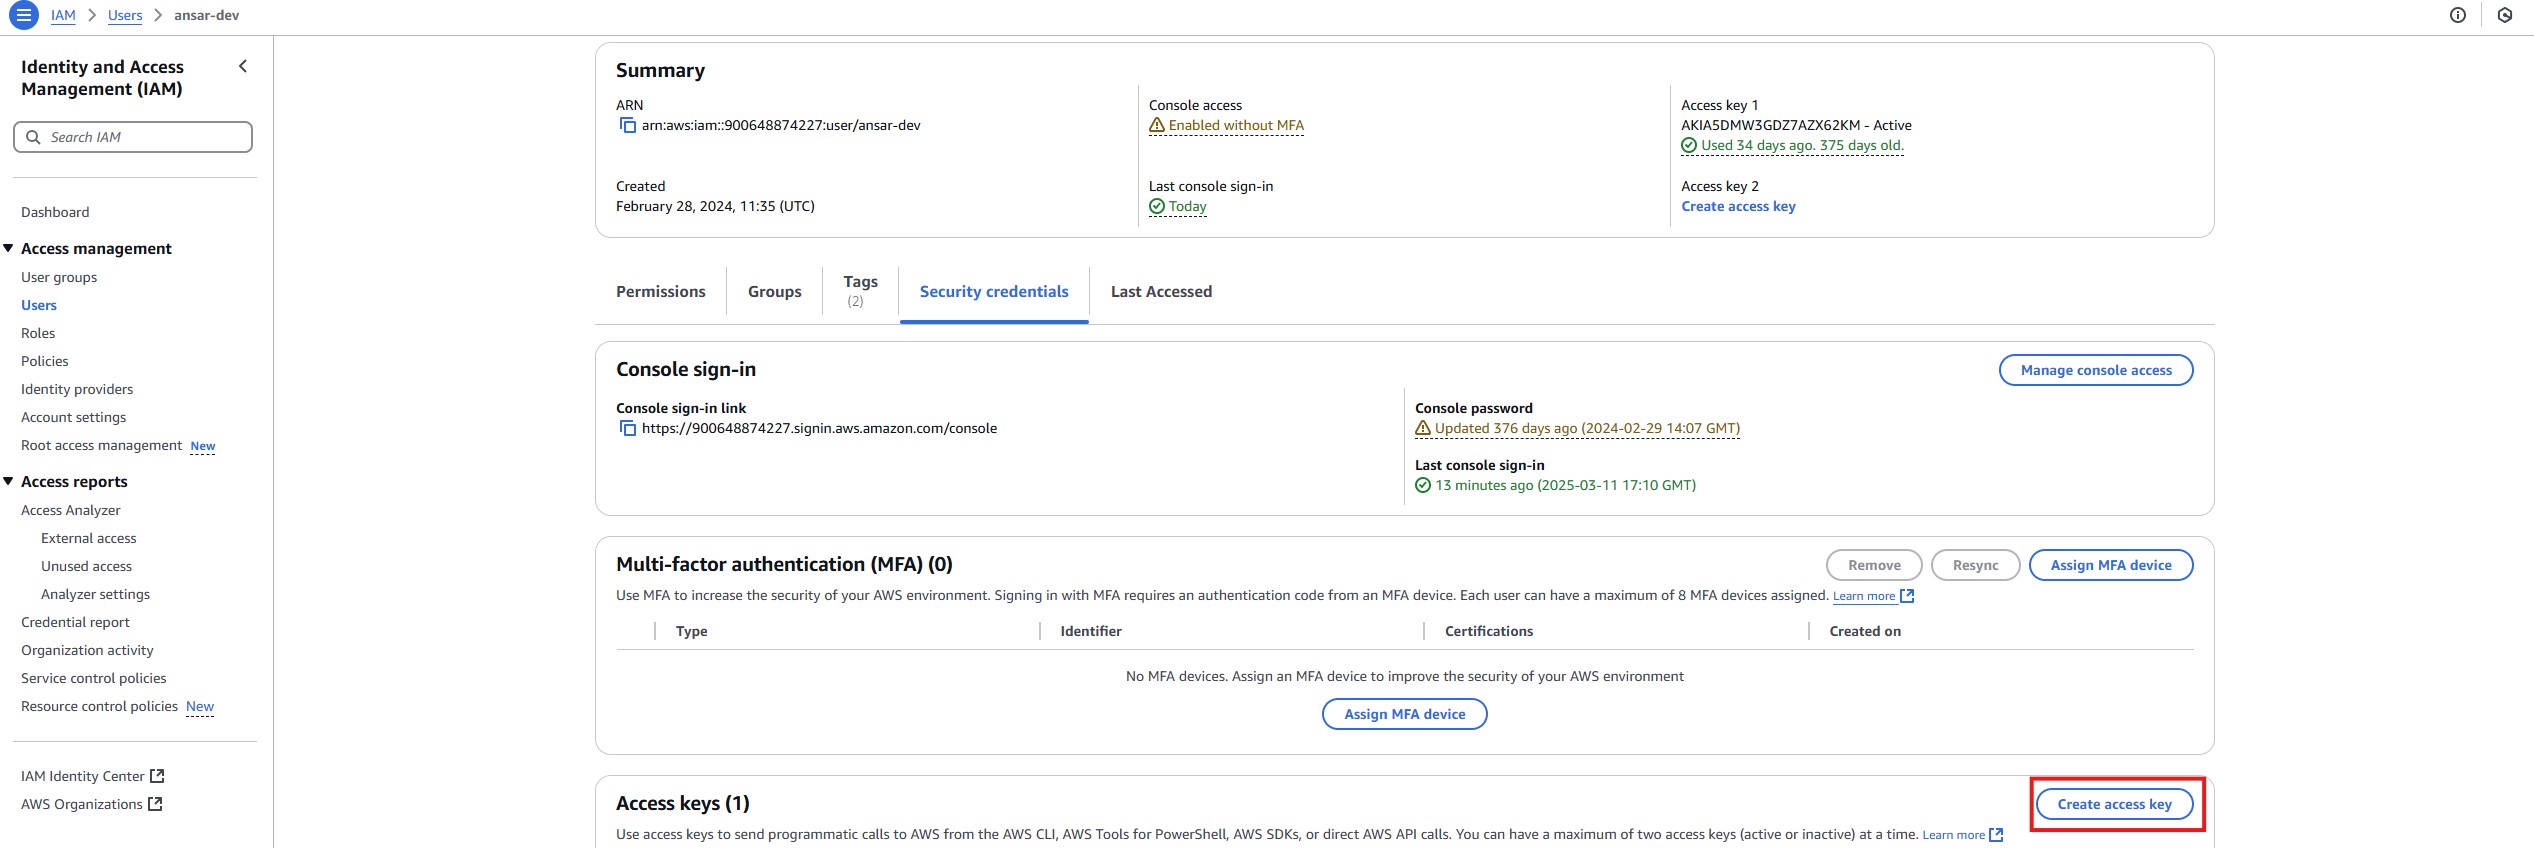
- AWS Access Key ID: This is a key that allows you to access AWS services. You can obtain it by logging into the AWS Management Console, navigating to Identity and Access Management (IAM), and creating a new user with programmatic access. Once created, the Access Key ID will be provided to you.
- AWS Secret Access Key: This is the secret part of the Access Key pair. It's provided along with the Access Key ID when you create the user with programmatic access. Ensure you store this key securely, as you won't be able to view it again.
- Default region name: This is the AWS region where you want your AWS services to operate. Examples include:
eu-west-1(Ireland)eu-west-2(London)eu-west-3(Paris)
- Default output format: Choose how you want the CLI to display the results. Options include json, text, and table.Example input:
AWS Access Key ID [None]: AAKIEXAMPLE AWS Secret Access Key [None]: wJalFEMI/K7MDENG/bPxRfiCYEXAMPLEKEY Default region name [None]: eu-west-2 Default output format [None]: json
Step 3: Test the Configuration
To verify that the AWS CLI is correctly configured, try listing your S3 buckets:
aws s3 ls
If the configuration is successful, you will see a list of your S3 buckets. As you have not created any bucket yet, it will show an empty list. If there are any issues, you will likely see an error message indicating the problem.
Setting Up AWS Resources
Before cloning and running the application, you need to create an S3 bucket and a DynamoDB table on AWS, as the application will use these resources for storage and metadata management.
1. Creating an S3 Bucket:
The S3 bucket will be used to store the images uploaded by the users and processed by the application.
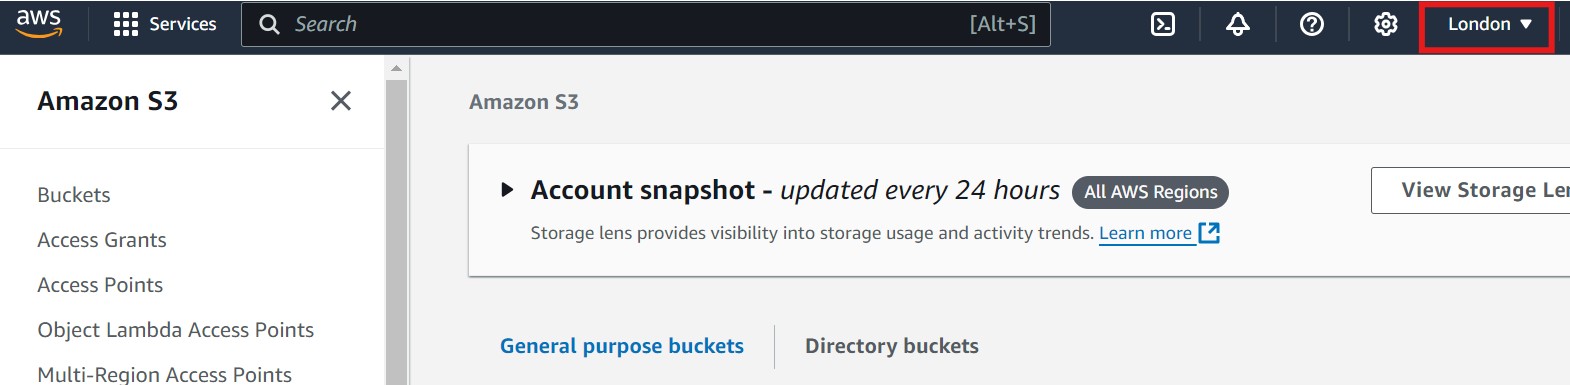
- Open the AWS Management Console and navigate to the S3 service. Please make sure you are in the correct AWS region. You can select the region by clicking on the region dropdown in the top right corner of the console. Refer to the image below, where the region selection is highlighted with a red box for guidance on changing the region.
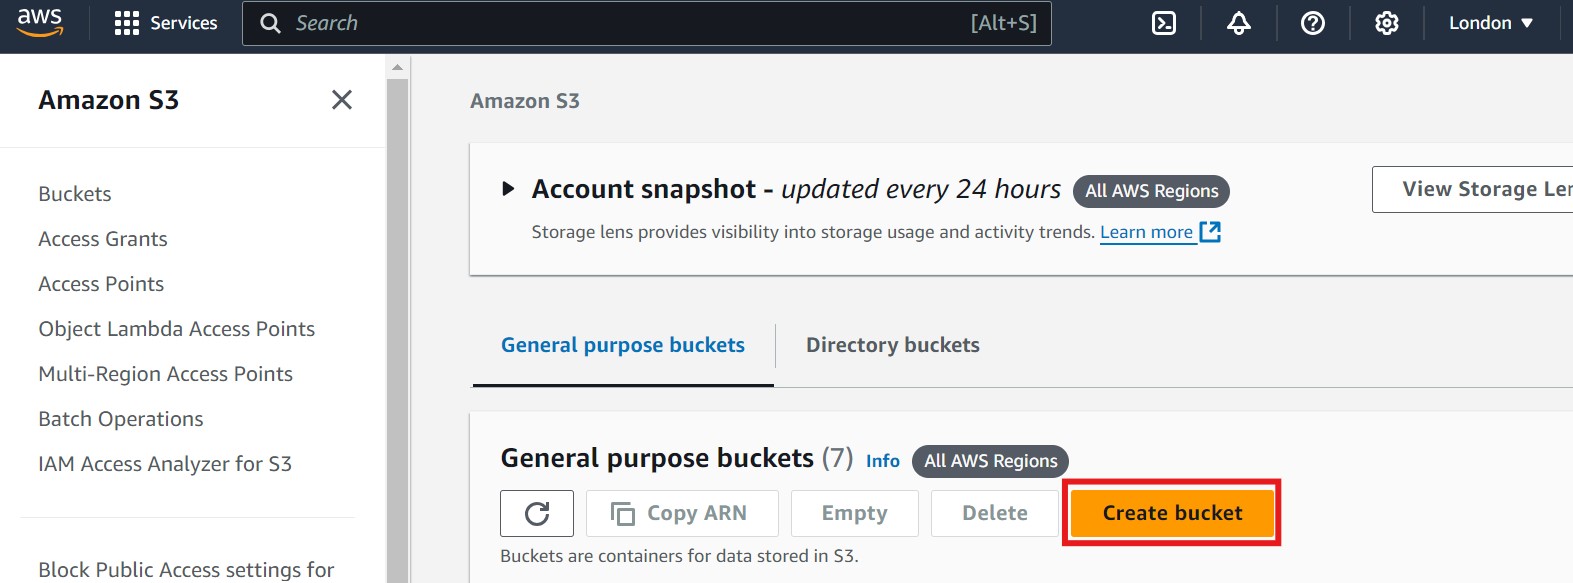
- Click on Create bucket. Refer to the image below if you need guidance, where the "Create bucket" option is highlighted with a red box:
- Provide a unique bucket name (e.g.,
ar-image-processing-bucket). It's recommended to include your initials or another unique identifier in the bucket name to avoid naming conflicts. Refer to the image below, where the field for entering the bucket name is highlighted with a red box: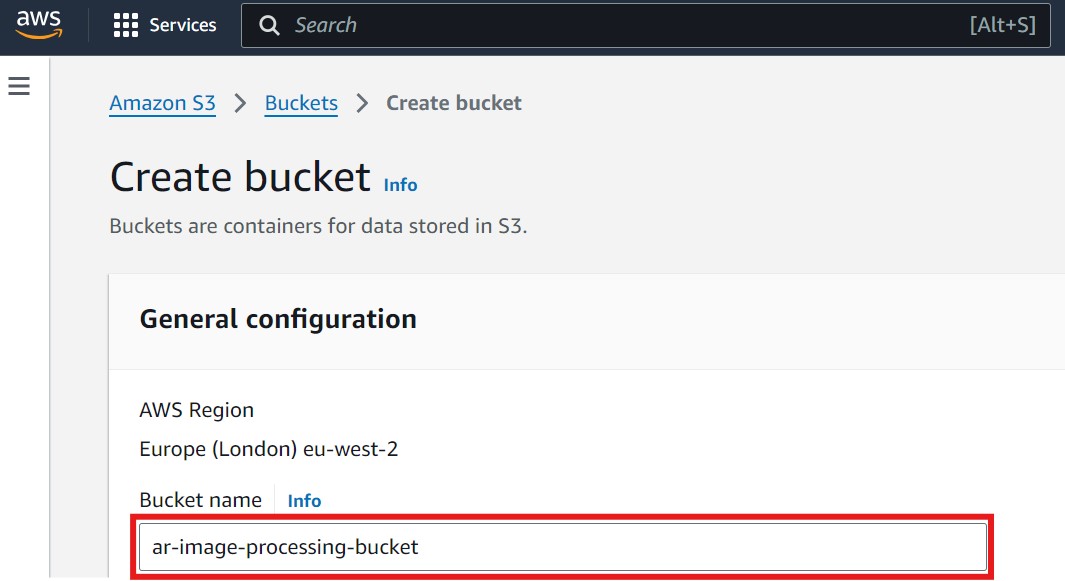
- Leave the other settings as default unless you have specific requirements. However, it's important to understand and consider the following options:
- Object Ownership defines the access control behavior for objects uploaded to the bucket. By default, Amazon disables Access Control Lists (ACLs), which is the recommended approach for most use cases as it simplifies permissions management. Disabling ACLs ensures that the bucket owner automatically owns all objects, even if they are uploaded by different AWS accounts.
- Block Public Access settings are critical for securing your bucket. By default, Block all public access is selected, which is highly recommended unless you need to expose objects publicly. This setting prevents any accidental exposure of sensitive data stored in the bucket.
- Bucket Versioning is disabled by default. Enabling versioning allows you to retain multiple versions of an object, which is useful for backup and recovery scenarios. If versioning is important to your use case, you can enable it after creating the bucket.
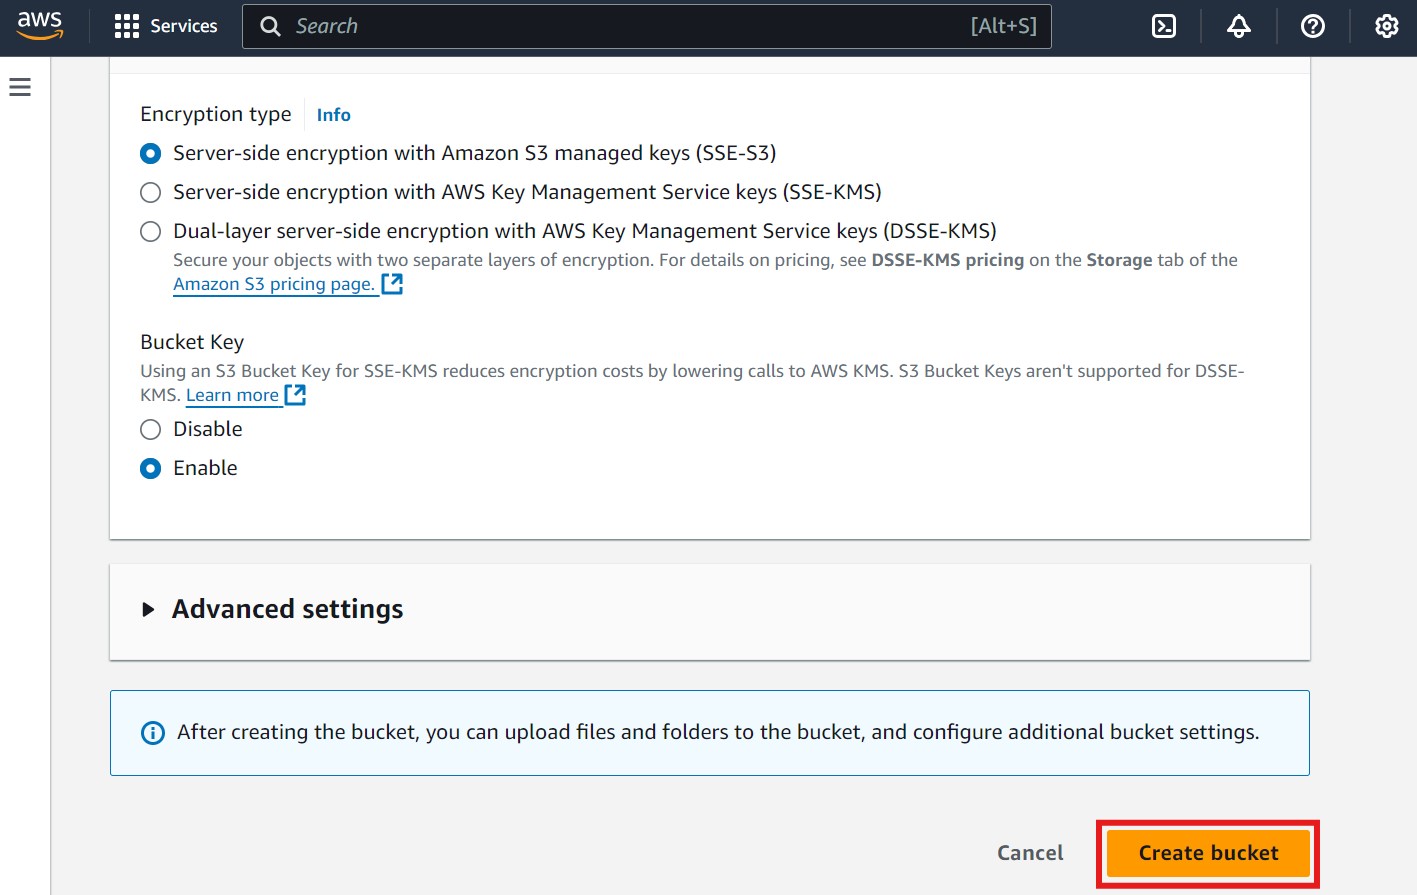
- Server-Side Encryption (SSE) is automatically applied to new objects stored in the bucket. By default, SSE-S3 (Server-Side Encryption with Amazon S3 managed keys) is selected. This ensures that your data is encrypted at rest without requiring you to manage encryption keys.
You also have the option to choose:- SSE-KMS: Server-side encryption with AWS Key Management Service (KMS) keys, which allows you to have more control over encryption keys.
- DSSE-KMS: Dual-layer encryption using AWS KMS keys for even greater security. This option applies two separate layers of encryption to your data, although it might incur additional costs.
- Bucket KeyIf you select SSE-KMS, you will also have the option to enable the S3 Bucket Key, which reduces the cost of encryption by minimizing calls to AWS KMS. Enabling S3 Bucket Keys can optimize costs when encrypting large volumes of data. This option is automatically enabled by default but can be disabled if necessary. Note that it is not supported for DSSE-KMS.
- Click Create bucket once you are comfortable with these settings. Refer to the image below for guidance, where the "Create bucket" button is highlighted with a red box:
2. Creating a DynamoDB Table:
The DynamoDB table will be used to store metadata related to the images.
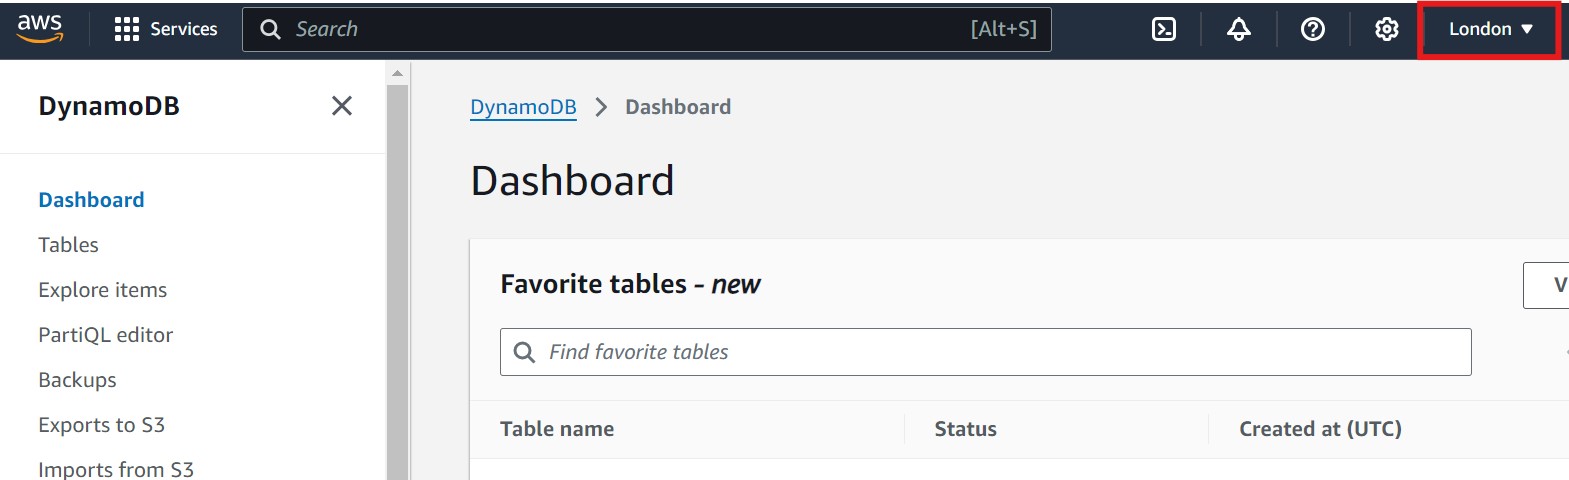
- Open the AWS Management Console and navigate to the DynamoDB service. Please make sure you are in the correct AWS region. You can select the region by clicking on the region dropdown in the top right corner of the console. Refer to the image below, where the region selection is highlighted with a red box for guidance on changing the region.
- In the left panel, click on Tables. This will display the tables panel on the right-hand side, where you will see a Create table button. Click on Create table to begin setting up your new table. Refer to the images below for guidance, with each relevant section highlighted in a red box:
- Provide a table name (e.g.,
ar-ImageMetadata) and set the Partition key toid(String). It's recommended to include your initials or another unique identifier in the table name to avoid naming conflicts. Refer to the image below for guidance, where the table name and partition key fields are highlighted with a red box: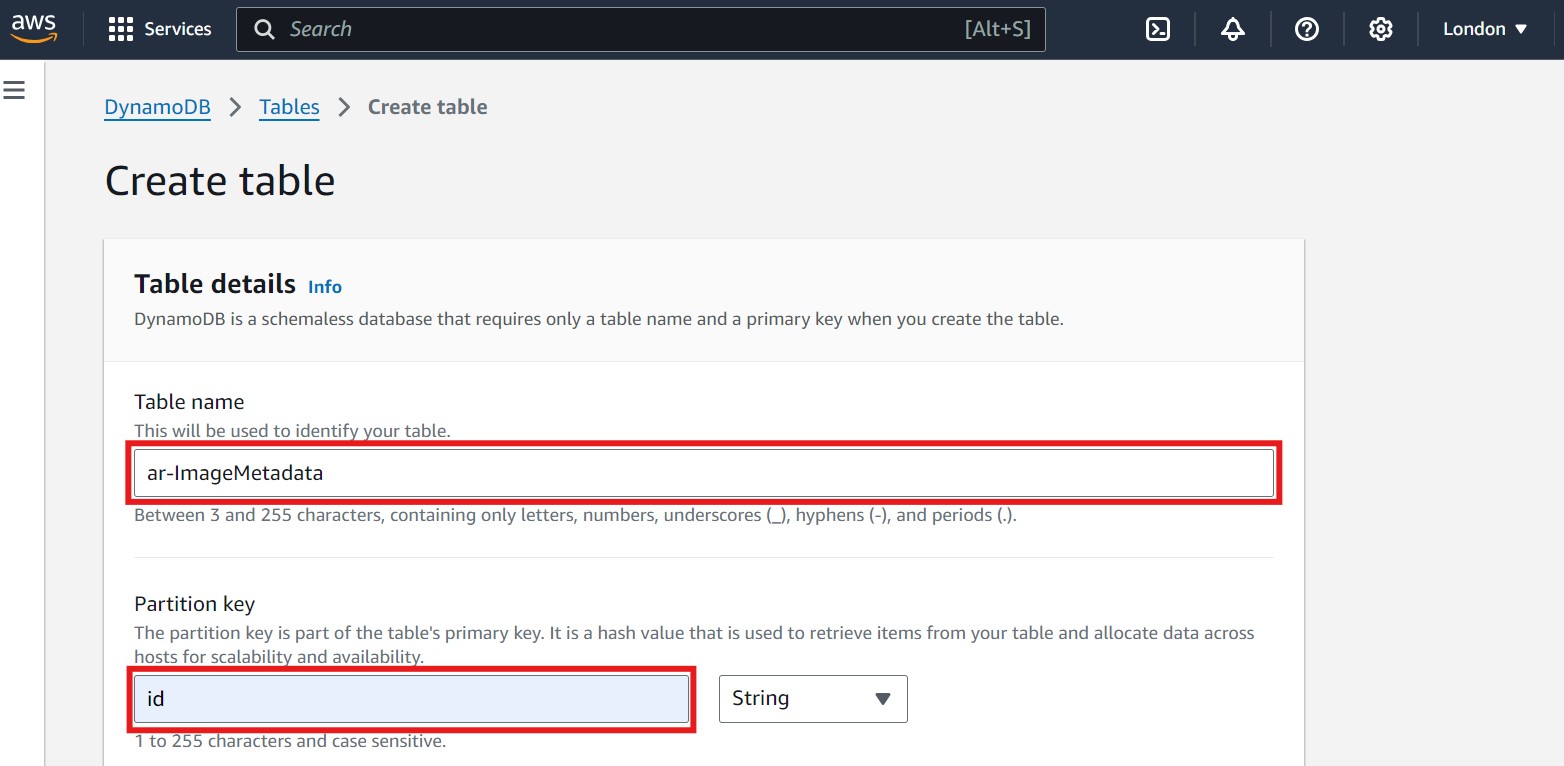
- You can leave the other settings as default unless you need advanced configuration.
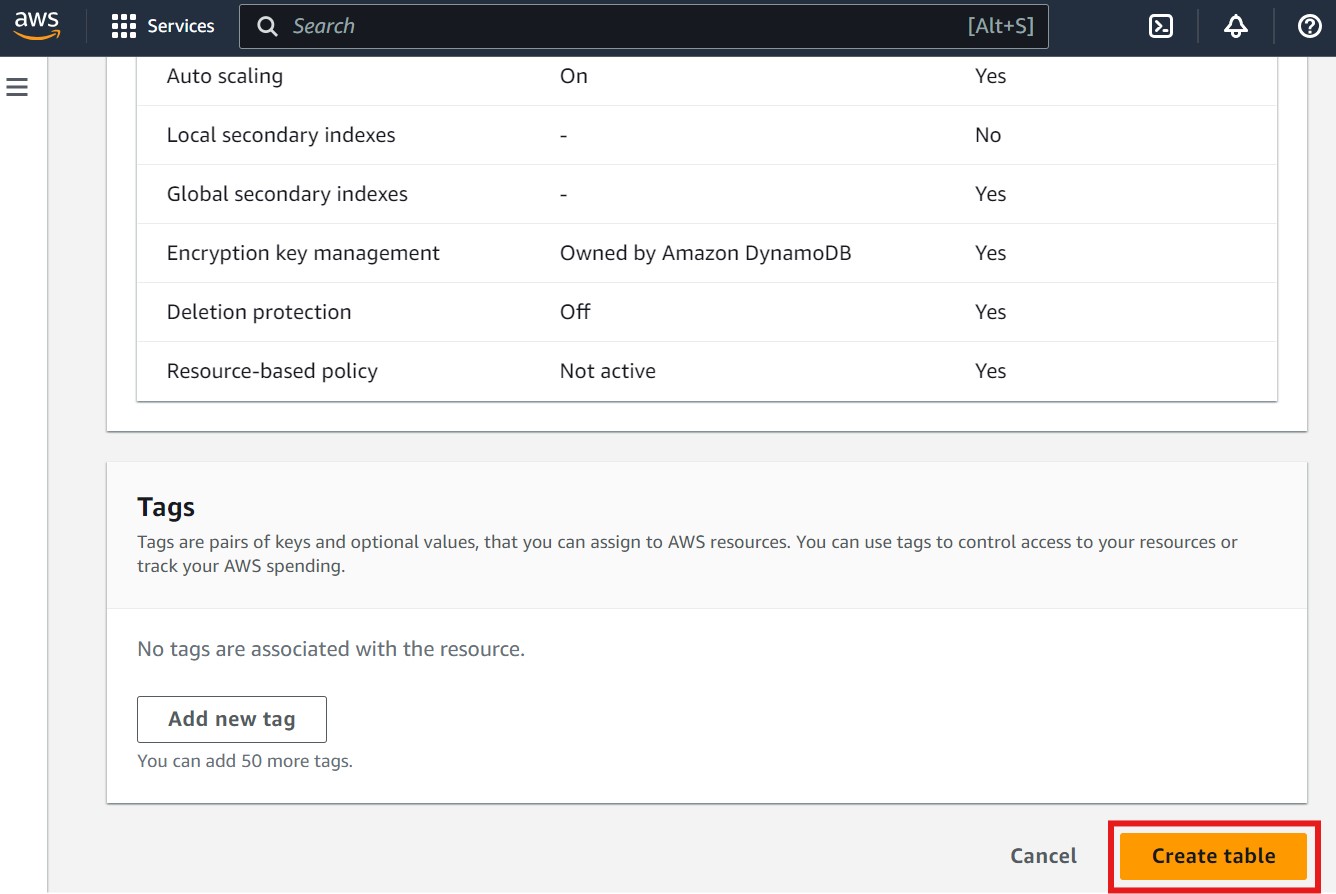
- Click Create table to finalize the setup. Refer to the image below for guidance, where the "Create table" button is highlighted with a red box:


Once these resources are set up, you can proceed to clone the application and configure it to use the S3 bucket and DynamoDB table.
Cloning the Application from GitHub
To get started with the image processing application, follow these steps to clone the repository and set it up locally:
- Clone the repository from GitHub:
git clone https://github.com/Oxford-Research-Cloud-Competency-Centre/image-processing-hybrid-app - Navigate to the project directory:
cd image-processing-hybrid-app
Once cloned, and before running the application, you need to create a
.env file in the root directory of the project. This file will store environment variables such as the AWS region, S3 bucket name, and DynamoDB table name. These variables will be used by the application to connect to the appropriate AWS resources and manage image storage and metadata effectively. In many setups, especially in shared environments, you will be provided with AWS credentials associated with a named profile. This is configured in your ~/.aws/credentials file and allows you to switch between different AWS accounts or roles.Below are the required entries for the
.env file:REGION_NAME = 'YOUR_AWS_REGION' S3_BUCKET = 'YOUR_AWS_S3_BUCKET_NAME' IMAGE_METADATA_TABLE = 'YOUR_AWS_DYNAMODB_TABLE_NAME' AWS_PROFILE = 'YOUR_AWS_PROFILE_NAME'
Note: Please replace the values above with those specific to your AWS resources. Ensure you use the correct region, S3 bucket name, and DynamoDB table name that you created. If you omit AWS_PROFILE and your default profile does not have access, your application will fail to authenticate with AWS services.
Running the Application
The application can be run in two different ways, depending on your setup:
1. Running Locally with Python:
To run the application locally on your system:
- Make sure the repository is cloned and you are inside the home directory of the application.
- Install the necessary Python dependencies:
pip install -r requirements.txt - Run the Flask application:
python -m app.app
The application will be accessible at
http://localhost:50002. Running with Docker:
Alternatively, you can run the application inside a Docker container:
- Build the Docker image:
docker build -t image-processing-hybrid-app . - Run the Docker container:
docker run -p 5000:5000 -e AWS_ACCESS_KEY_ID=your_access_key -e AWS_SECRET_ACCESS_KEY=your_secret_key -e AWS_DEFAULT_REGION=your_aws_region image_processing_cloud_app_localYou can retrieve your AWS credentials (e.g., AWS_ACCESS_KEY_ID, AWS_SECRET_ACCESS_KEY, and AWS_DEFAULT_REGION) by checking your ~/.aws/credentials file. Your application inside the container can now access these credentials from the environment variables, and AWS SDKs will automatically pick them up.
This will make the application available at
http://localhost:5000, without the need to install Python or any other dependencies directly on your machine.Resource Cleanup
Once you've set up and used the S3 and DynamoDB resources for this application, it's important to clean up these resources to avoid unnecessary costs. Follow the steps below to delete the resources.
- Delete S3 Bucket:
- Go to the S3 console and locate the bucket you created for this application.
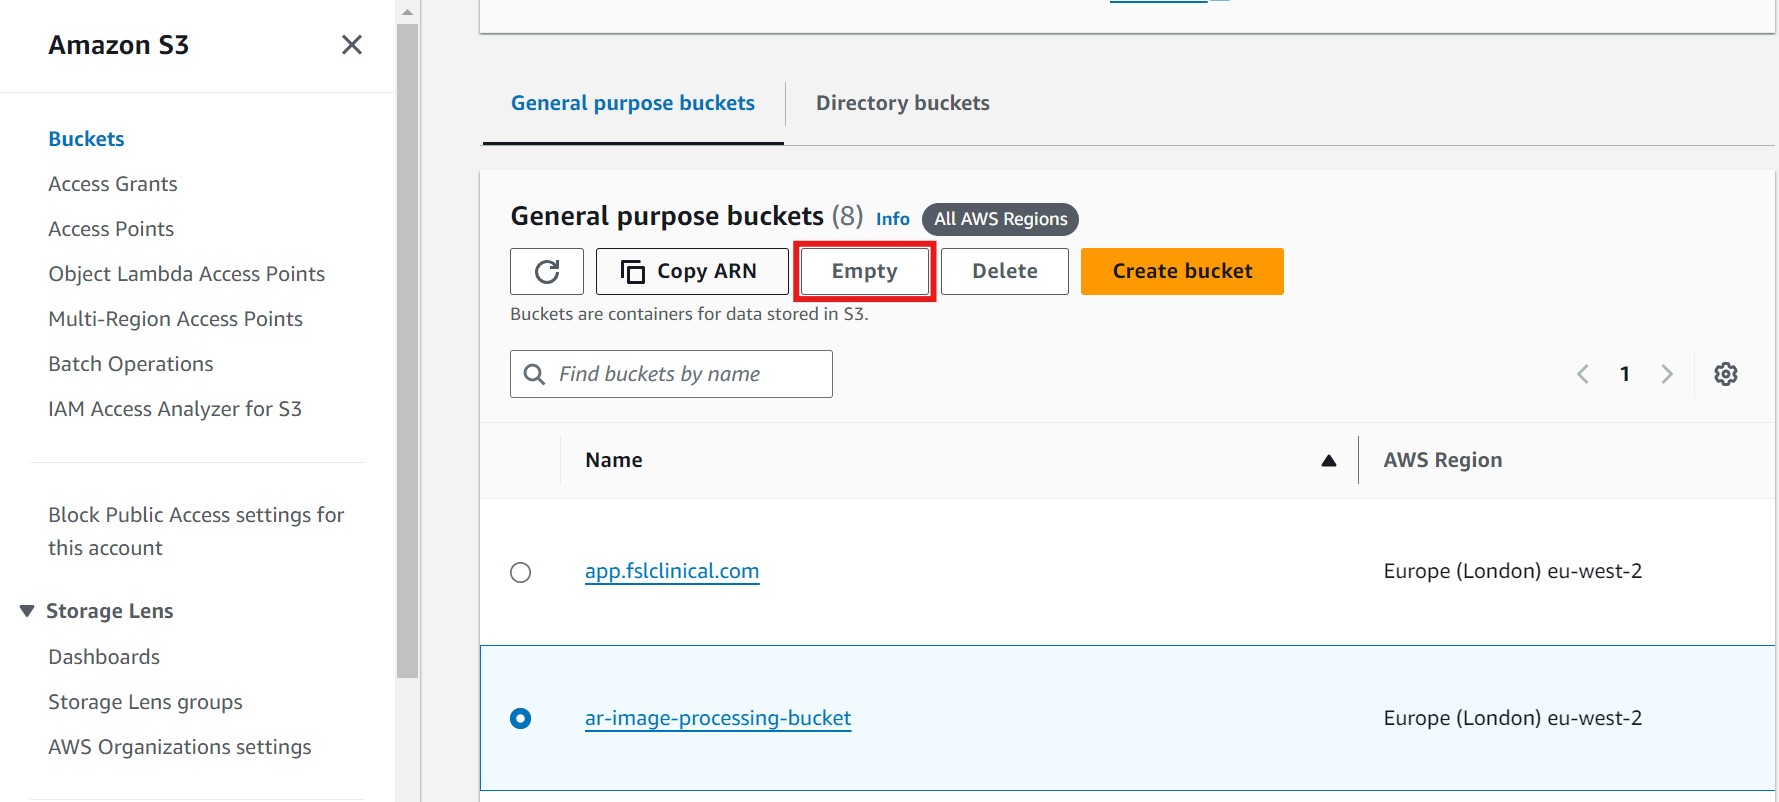
- Select the bucket, then click on Empty to delete all objects within the bucket. Refer to the image below, where the Empty button is highlighted in red for guidance:
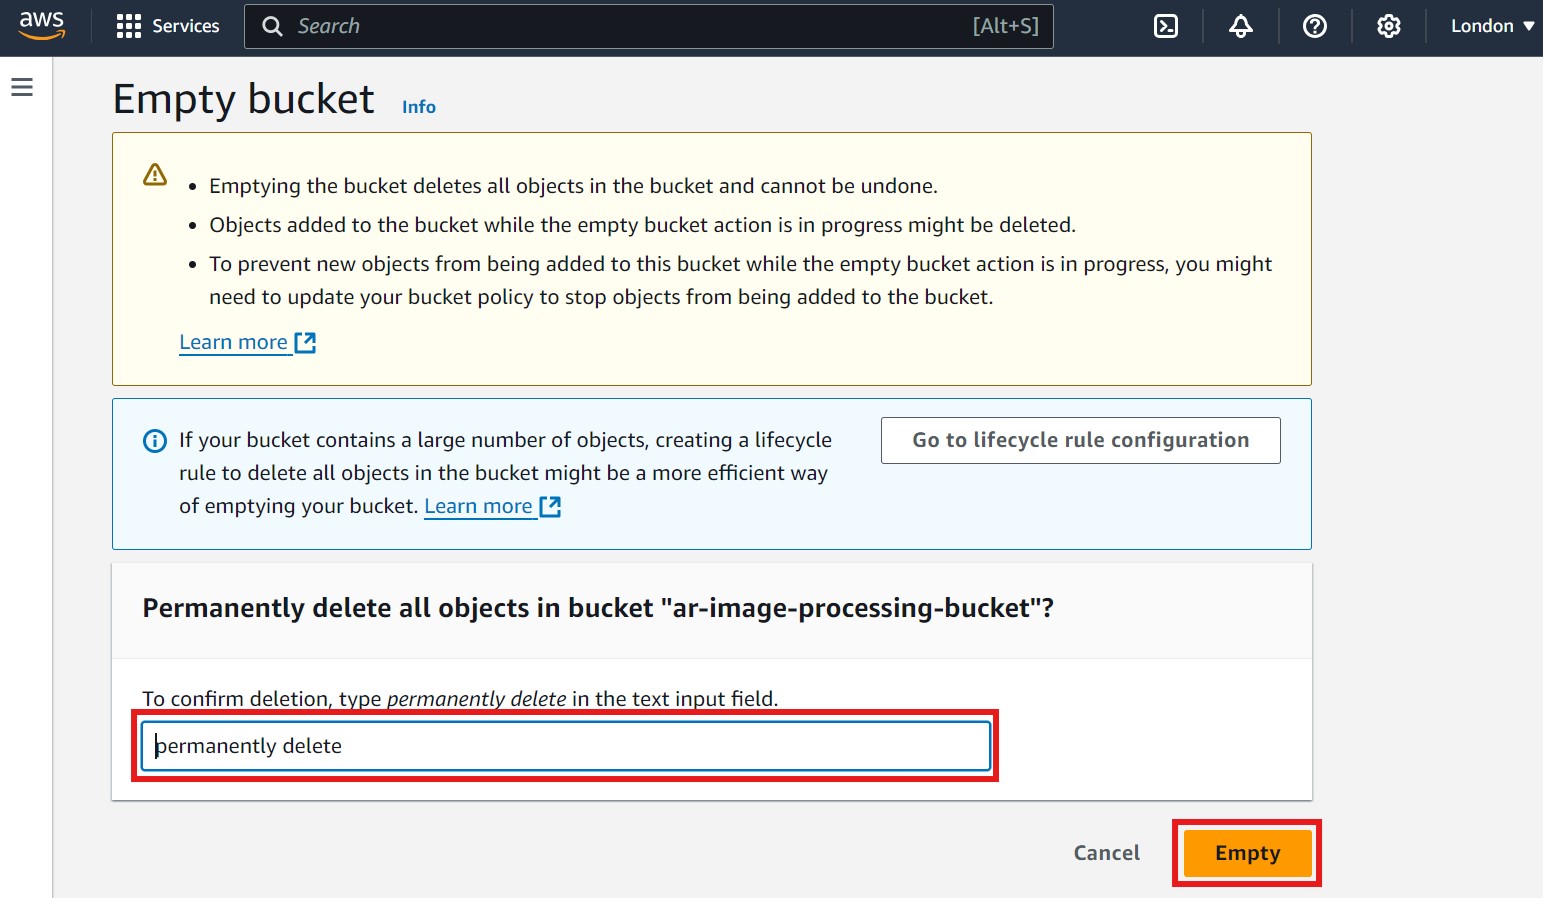
- After clicking Empty, a new page will open. To confirm deletion, type "permanently delete" in the text input field, then click on Empty again to finalize. Refer to the image below for guidance, where the confirmation field and Empty button are highlighted in red:
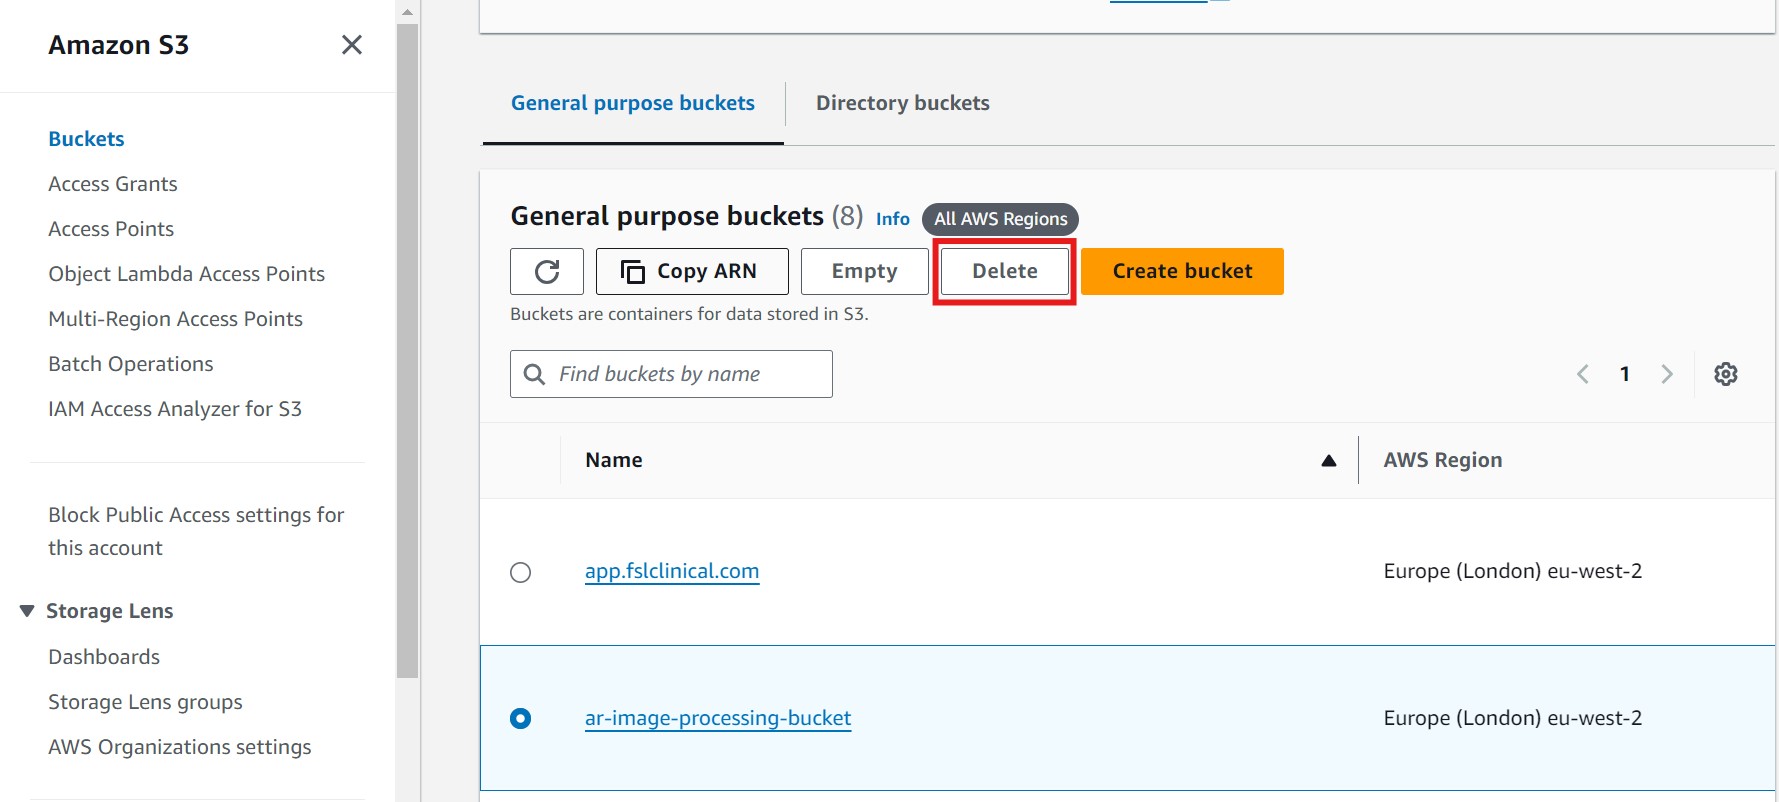
- After emptying the bucket, return to the bucket's main page and click on Delete to remove the bucket itself. Refer to the image below, where the Delete button is highlighted in red:
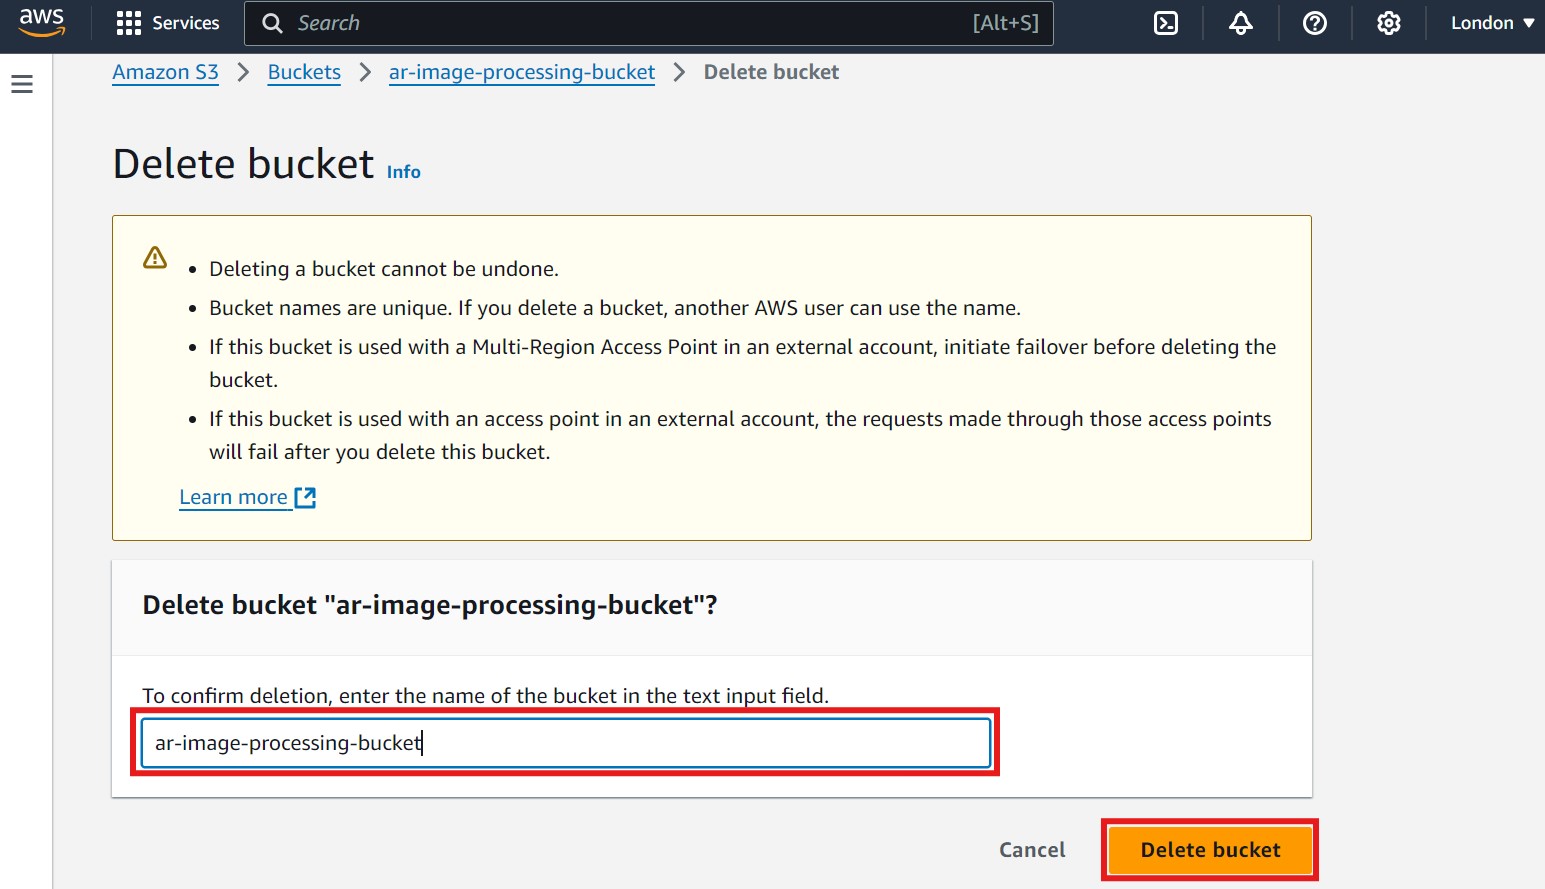
- A new window will open. To confirm the bucket deletion, enter the bucket name in the text input field, then click on Delete Bucket. Refer to the image below, where the confirmation field and Delete Bucket button are highlighted in red:
- Please Note: It may take a few moments for AWS to fully delete the bucket. Wait until you see a confirmation message indicating that the bucket has been deleted to ensure the resource is fully removed.
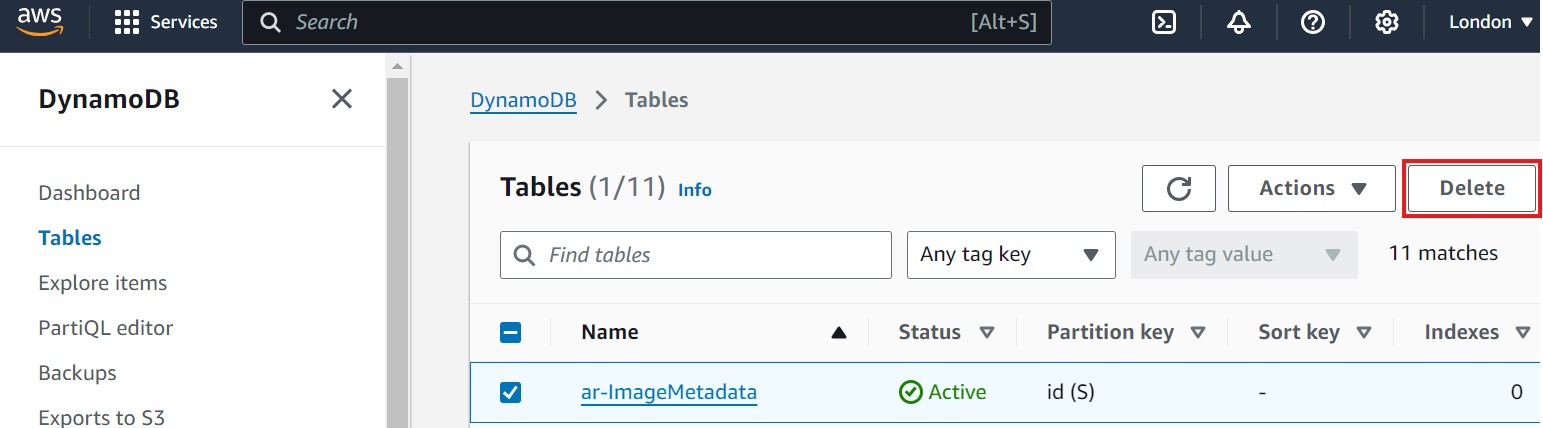
- Delete DynamoDB Table:
- Navigate to the DynamoDB console.
- In the Tables section, locate the table you created (e.g.,
ar-ImageMetadata). - Select the table, then click on Delete table to remove it. Refer to the image below, where the Delete table button is highlighted in red:
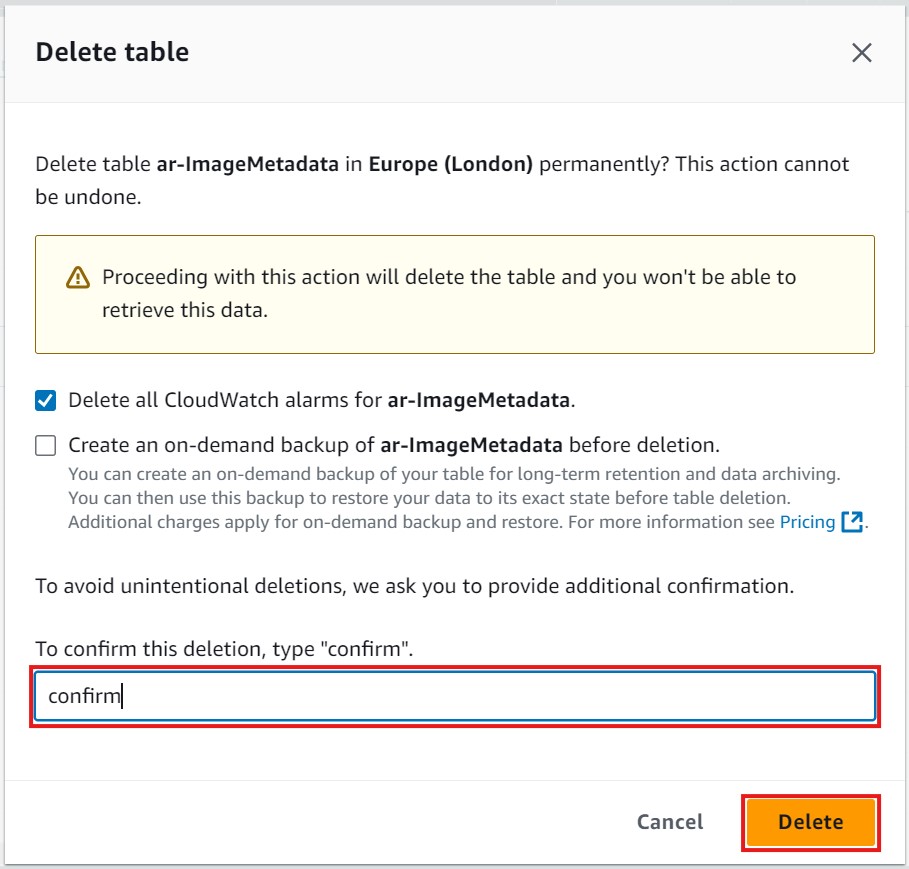
- After clicking Delete table, a new window will open asking for confirmation. Type confirm in the text input field, then click on the Delete button to finalize the deletion. Refer to the image below, where the confirmation field and Delete button are highlighted in red:
- Please Note: It may take a few moments for AWS to fully delete the table. Wait until you see a confirmation message indicating that the table has been deleted to ensure the resource is completely removed.
Ensure you have backed up any necessary data from these resources before deleting them, as this action is irreversible.